Primary Domain
Sub Domain
Hongkong Domain
-
OverView

 Pad printing is a relatively new printing process compared with screen printing and letterpress. It developed when it was possible to make printing pads out of silicone rubber, and has seen substantial growth over the past few decades.
  Silicone rubber repels many substances (including ink), and by moulding itself to any given object, allows you to print on uneven surfaces. You can print on irregular surfaces, on sloping and vertical surfaces, with more than
 -
What is it used for?
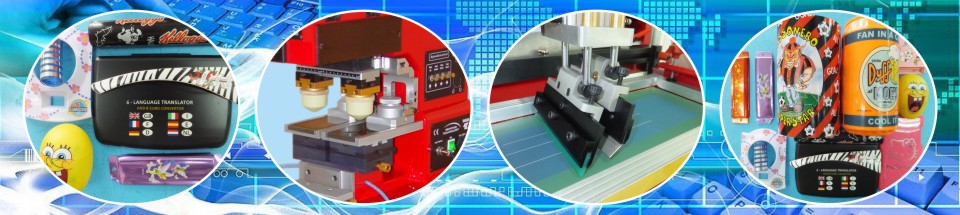
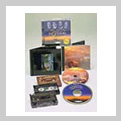
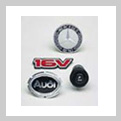
 It is the latest technique for printing on objects that are not flat or varied in size. It can be used on almost any surface including:
  Computer parts, micro chips, relays, panels, mobile phones, switches Rulers, scales on measuring instruments, radio and TV casings Electrical equipment, domestic appliances, publicity articles, packaging, decoration CDs, golf balls, spectacles, toys, sporting goods, souvenirs.
 -
How does it compare with other printing processes?
It is not possible to state exactly when did the use of pad printing begin and that for other printing processes end. Pad printing complements the other existing printing methods.
Compared to the screen printing process, pad printing overcomes the problem of limitation when the printing surface can no longer accommodate the linear contact of the ink squeegee.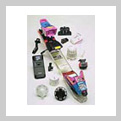
-
What are inclued in a pad printer?
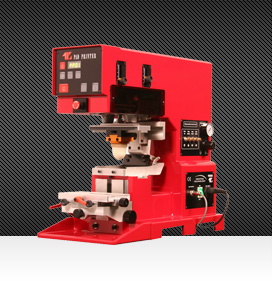
A basic pad printing machine consists of:
 a silicon pad a device to hold the product in place for printing a metal or plastic plate (cliche) that contains the printing design, and an inkwell with spatula and doctoring device, or a closed ink cup system.
In advanced models, this basic design is supplemented with mechanisms that load, unload and index (register) the parts at high speed.
The machines operate under reciprocal motion: The pad alternately picks up ink from the cliche and then deposits it onto the product.
Rotary pad printers that print round and flat objects at high speed are also available. They operate on continuous rather than reciprocal motion - circular pads rotate constantly to transfer the design.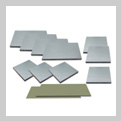 Cliche (plate) types
Several cliche types are currently available. Over the past years, thinner steel cliches (0.5 + 1mm) have been introduced. The oldest and most durable are hardened 10mm steel cliches. Properly made steel plates will last about one million impressions and are best produced by your pad printing supplier or manufacturer.
Plastic photo polymer cliches for in-house plate making are also available and very popular. These products are inherently photosensitive - they are exposed with UV light and developed either with water or alcohol.Pad types
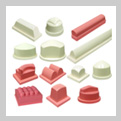 Pads are available in an assortment of size, shape and hardness. The type of pad used depends on the printed material and the design that will be printed.
Harder pads generally offer longer life and better print clarity, though they are not always suitable for fragile materials. For multi-colour print to run, pad shape varies not only from part to part but frequently from colour to colour because of the different coverage requirements.
Given the importance of pad design, it is best left to experts. Most pad printing manufacturers and suppliers offer standard pads for common items, as well as custom pad-making services.Tooling
The final, and often the most costly component in the pad printing process, is the tooling (also referred to as the nest, cavity, fixture or holder) that registers the material and holds it in place through the print cycle.
For manual applications, a number of universal fixtures are available that can be adapted for a variety of materials. Simpler tooling for manual work can often be improvised with a little imagination (for example, using a shot glass to hold golf balls in place.)
Still the most accurate tooling is custom manufactured by machine shops or by the makers of pad printing equipment. For automated machines, tooling costs can range from several hundred to several thousand dollars, depending on the application. -
How is the printing process?
Regardless of the machine design, five basic steps occur during a print cycle. During these steps, special changes that take place in the ink help to explain why and how this unusual process works.
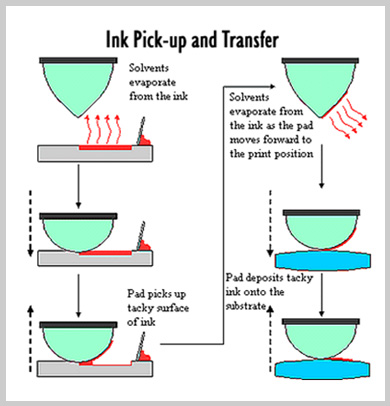 STEP 1: Ink flooding. The entire cliche, which sits on the inkwell, is flooded with ink automatically.
A steel doctor blade then cleans excess ink from the cliche surface, leaving ink only in the etched areas. Many machines have separate flooding and doctor blades that operate much like the squeegee/ floodbar assembly on a screen printing machine. Pad printing inks are similar to solvent based screen printing inks, except they have a higher pigment content for better opacity and higher tack (to promote adhesion to the substrate). After the cliche is wiped by the doctor blade, the surface of the ink in the engraving becomes more viscous and tacky as the solvents evaporate, improving the ink's ability to wet the pad.
STEP 2: Pad wetting. The pad is positioned directly over the cliche, pressed onto it to pick up the ink and then lifted away. The physical changes in the ink that take place during flooding, combined with the high surface tension of the silicone pad, account for the ink's ability to leave the recessed engraving in favour of the pad.
On occasion, printers have attempted to improve pad printing's limited ink deposit by increasing the cliche depth, believing that more ink in the cliche will translate into more ink on the pad and subsequently on the substrate. This theory is based on the incorrect assumption that the pad picks up 100% of the ink from the cliche. Because of the surface changes in the ink after flooding, only a proportion of the ink is actually picked up by that pad. In other words, only a negligible increase in ink deposit can be achieved in this manner.STEP 3: Head Stroke. After the pad has lifted away from the cliche to its complete vertical height, it moves laterally until it is positioned over the substrate. During this stage, the ink has just enough adhesion to stick to the pad (it can be easily wiped off, yet it does not drip).
The ink on the surface of the pad once again undergoes special changes: solvents evaporate from the outer ink layer (exposed to the atmosphere), while solvents on the inner surface migrate towards the pad, reducing the pad/ink adhesion.STEP 4: Ink Deposition. The pad is pressed down onto the substrate, conforming to its shape and depositing the ink in the desired location. Even though it compresses considerably during this step, the pad is designed to roll away from the substrate surface rather than press against it flatly.
A properly designed pad, in fact, will never form a contact angle with the substrate: such a situation would trap air between the pad and the part, which would prevent ink transferSTEP 5: Pad Release. The pad lifts away from the substrate and assumes its original shape again, leaving all but a scant trace of the ink on the substrate.
As explained in Step 3, the ink undergoes special changes during the head stroke and loses its affinity for the pad. When the pad is pressed onto the substrate, the adhesion between the ink and substrate is greater than the adhesion between the ink and pad, resulting in almost complete deposition of the ink. This leaves the pad clean and ready for the next print cycle.